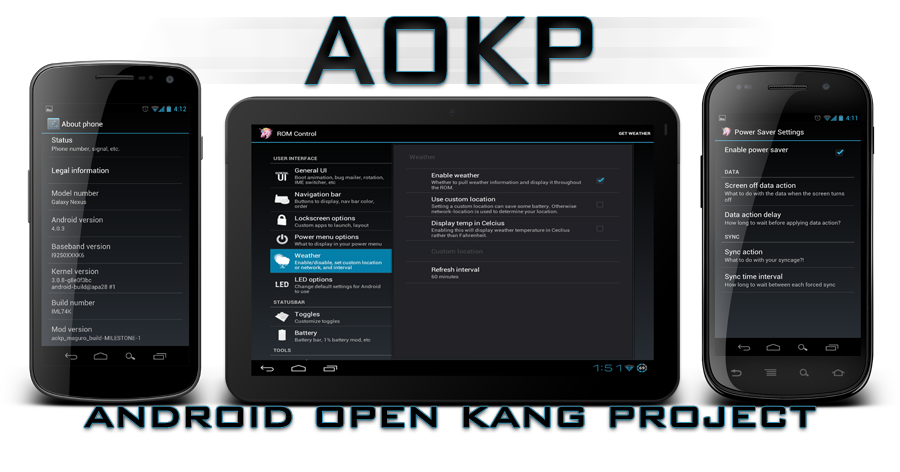
Followers

Huawei Mediapad_2.06.26_OsiMood - Light gets Lighter Android Gingerbread 4.0.3 How To

Huawei MediaPad


Thanks and credits
to all these great opensource communities, and of course KANG team and mediapad developers.

Features:
  • Unsecure boot.img (stock AOSP kernel)
  • Superuser & Busybox preinstalled
  • Deodexed
  • 180 Degree rotation
  • Built in performance/init.d configuration (Thanks Kejar & company)
  • Custom Power Menu
  • Brightness slider in navigation bar.
  • Custom color for anything in RC
  • Custom Clock Color/Location: Right, Center, Disable
  • Battery Icon/ Color Picker: CircleMod, Bar, Text Only, Icon Only, Icon+Text or None
  • Battery Bar in Status Bar or Nav Bar, Bar Thickness, Charging animation
  • Nav Bar Transparency
  • Nav Bar Button Reorder: Back-Home-Search-Menu
  • Nav Bar Color Picker
  • Nav Bar Button Glow Duration: Off, Fast, Slow
  • Nav Bar: Long press to Search button
  • Nav Bar Hide on Lockscreen
  • Toggles in Pull Down Menu: Auto rotate, Bluetooth, GPS, Wi-Fi, Aiplane mode, Vibrate,
  • Silent, Sync, Data, 4G, Tethering, Torch, Brightness
  • 'Traditional' toggle layout (where the toggle are on the very top) -- find in RC > Statusbar
  • General > Layout
  • LCD Density (Careful with this)
  • Menu Button location: Right, Left, both, Remove
  • Menu Button Visability: Always show, Always show Invisible Icons
  • Lockscreen Style: Stock, Quad, Octo, ol' gingerbread
  • Lockscreen Wallpaper
  • Lockscreen color changer
  • Lockscreen calendar
  • Lockscreen SMS customizable shortcut (with icons)
  • Lockscreen Horizontal Option
  • Performance Menu: (Use With Caution) Max/ Min CPU, Scaling Governor
  • Unlock Sceen with Legacy Menu Icon
  • Volume Key to Wake Screen
  • Volume Key to Skip Tracks
  • Long-press back button to kill process
  • Disable CRT off animation
  • LED pulse settings (time on/off)
  • ICS ringtones/notification sounds
  • Customize carrier text to whatever.
  • Power Menu options: Boot to recovery/ Boot loader, Reboot, Screenshot
  • Facebook contact sync integration (must wipe to get this)
  • Disable Boot animation
  • Keyboard: Volume keys act as a cursor while typing -- disable in keyboard options
  • Long press home for recent apps (thanks brucekey)
  • Quick torch (enable in ROMControl, long press power when phone turned off. See the magic.)
  • Fast charge toggle for maguro/toro for kernels that support it
  • Weatherpanel in notification drawer
  • Weather on lockscreen
Work:
  • Radio
  • Data connection
  • Touchscreen
  • Full hardware acceleration
  • Sound
  • Microphone
  • Sensors
  • Camera
  • Wi-fi
  • HDMI
  • GPS
  • Usb-host
  • Usb connection to PC (mtp, ptp)
  • Bluetooth
Problems:
  • Some glitches in preview of running apps;
  • Broken photo/camcorder preview;
  • Random mac address after reboot;
  • Wrong country detection in Google Play over wifi with turned off radio.
  • Rom Description:
  • This rom is my daily driver, I like my tablet, clean without anybloatware or unneccessary app or widgets from T-Mobile or Huawei
  • Based on firmware C232B005 - Android Gingerbread 4.0.3
  • Rooted - latest version
  • Removed all unnecessary applicationsLatest version 2.06.26Make a backup before installing, I am not responsible if YOU don't know what you are doing!
  • you Know How to update it Ok Now go & see Procedure i hope perfectly working to this 

Lenovo Thinkpad Tablet ROMs Jelly Bean 4.1.1 How To Working Procedure Here


UPDATE SP_Flash_Tool_v3.1332.0.187 About All Mtk Scat File Flasher tool

SP_Flash_Tool_v3.1332.0.187


Samsung Copy N7100 Copy MTK Android Factory Rom Share About Flash File 

 Download

Lenovo Ideapad K1 ROMs Procedure here About This Tablet


Install Jelly Bean 4.1.1 on Qmobile Noir A8 Procedure Here About Android Mobile


Warning: Follow the guide at your own risk, We will not be held responsible if anything goes wrong by following the steps mentioned below

Installing Jelly Bean 4.1.1 on Qmobile A8 procedure:


  1. First of all make sure your phone is ROOTED. If it’s not, follow out guide on
  2. Now install ClockWorkMod Recovery from Google play or anyother external site on your Qmobile Noir A8.
  3. Download one of the following two ROMs:
IncPak’s Jelly Bean 4.1.1 ROM for Qmobile Noir A8 [Link 1] [Link 2]
WinGoku’s Jelly Bean 4.1.1 ROM for Qmobile Noir A8 [Link 1]
I recommend the Incpak's ROM as it is running on 2 of my phones...


  1. Now copy this download .zip file to your SD Card;
  2. Power Off your Noir A8;
  3. Boot your phone into Recovery mode: Hold down the POWER + VOLUME UP buttons, release the POWER button when you see the boot logo;
  4. Make a backup: select backup and restore, then backup. When it is done select Go Back;
  5. Now perform the following Wipes:
    Select Wipe/Data Factory Cache;
    Select Wipe Cache Partition;
    Go to advanced and select wipe dalvik cache;
    Go back to the main menu.
  6. Now select Select Install zip from sdcard, then Choose zip from sdcard and then select the .zip file that you copied to your SD Card and select Yes;
Once the installtion is completed, your Qmobile will reboot into JellyBean 4.1.1.
Please leave you feedback on this guide.Thank you

Backup your ICS using Roadkill Karbonn A9+ Procedure Here


1.Backup your ICS using Roadkill
Turn off your Flare, then press Volume down and power button at the same time. once you see the “ENTRY QPST DOWNLOAD”, open roadkill and click on Store Image Tab, select the disk with 3.61GB, click browse and select the location where you want your backup to be saved, and click start. Once finish proceed to next step.


2. Saving IMEI, MAC ID and Serial Number

Write your IMEI1, IMEI2, Wi-Fi Mac, and Serial Number (S/N) in a piece of tissue paper. For MAC ID, turn on your Wi-Fi, and go to Settings > About Phone > Status. For IMEI just dial *#0000# in dial pad.

3. Backup NVRAM

  1. Run EMMC_DownLoad_V1.2.3.exe ,(Check Download Boot Loader for 1st run)
  2. Turn device ON (make sure USB Debugging is enable)
  3. Connect phone thru microUSB cable (Note: Make sure there are no other USB Modem or phone connected to your computer except for Flare)
  4. Click BackUp_NV.
  5. Wait until back up is successful.


4. Download BP Firmware
  1. Go to ENTRY QPST DOWNLOAD” Mode (Power + Vol Down)
  2. Run EMMC_DownLoad_V1.2.3.exe. Click SELPATH select “BP Firmware” Folder.
  3. Connect phone thru a microUSB cable.
  4. Check Device Manager for "Qualcomm HS-Usb Diagnostics 9006" Com Port #.
  5. Look for "Qualcomm HS-Usb Diagnostics 9006" type the Com port # in EMMC Download Box. Click Download.
  6. Wait until download is successful (Usually it takes 6-12sec). Remove battery. (Do not Close EMMC Download. then proceed to next Step )


5. Download AP Firmware
  1. Run QUALFAST2.0.5.exe. Click SELPATH, select AP firmware (“Stock JB Rom” Folder), Check Format Card & Userdata
  2. Go to Fastboot Mode or Green Screen Mode (Power + Vol Up)
  3. Click OK to start download then connect phone via a microUSB cable.
  4. Wait until download is successful. Remove battery.


6. Restore NVRAM Backup
  1. Run EMMC_DownLoad_V1.2.3.exe.
  2. Turn device ON. (make sure USB Debugging is enable)
  3. Click Restore_NV. Browse and select bak.qcn file. Connect phone thru microUSB cable.
  4. Wait until qcn restore is successful. (your IMEI 2 is Null & Wifi Mac Address is set to default. you need to write it again)


7. IMEI & Wi-Fi MAC Address Writing
  1. Turn device ON (make sure USB Debugging is enable)
  2. Locate your modem com port number (Go to Device Manager > Right-click “Tianyu HS-USB Android Modem 9025” > Properties > Advanced Tab > Advanced Port Settings > COM Port # (Ex. 10))
  3. Open Qualcomm_Modem_Tools_V1.1.2.exe and type com port #
  4. Write all your backup code, then click Write button. (In my case I have re-entered my IMEI1, IMEI2, S/N (Serial Number), Wi-Fi MAC)
Note: Every after successful entry of IMEI, the phone automatically restarts.


8. Rooting
  1. Restart Device. Wait until it boot perfectly.
  2. Copy update.zip to internal memory.
  3. Reboot to recovery and update from internal sdcard.
  4. Reboot
  5. Enjoy. 
  6. [ROM] Karbonn A9+/Flare ICS to JB {Tutorial} (Links Posted) How To Working jelly Bean
  7.  Tutorial Revive dead Karbonn A9+/CM Flare after JB update About Mobile Solution

Tutorial Revive dead Karbonn A9+/CM Flare after JB update About Mobile Solution


Now ishare how to update karbonn a9+ cm/flare after jelly bean
See Step By Step Working tutorial & Download All File your computer 
Follow this guide carefully and you can revive your dead Karbonn A9+/ CM Flare after Jelly Bean Upgrade.

Tools Needed:
  1. Dead Phone (When u connect to PC it should install Qualcomm HS-USB QD Loader 9008 Driver) Link
  2. QPST.2.7.399 Link
  3. Flare Revival kit Link
  4. PC with 32 bit Windows (XP/Vista/7/8) (64bit casus problem in QPST installation)
  5. Procedure

[ROM] Karbonn A9+/Flare ICS to JB {Tutorial} (Links Posted) How To Working jelly Bean

  1. Connect ur phone to PC and let the driver install
  2. Install QPST


  3. Open QPST Configuration (in Win XP compatibility mode) ->Add new port -> Select the com port of your device ->exit.


  4. Go to Start -> All Programs -> QPST eMMC Software Download open the tool -> Check program boot loaders -> Browse for the device com port

  5. Extract Flare Revival Kit on desktop
  6. If Phone is not detected , Click Browse

  7. In flash programmer file name type MPRG8X25.hex -> in Boot Image type 8X25_msimage.mbn in SPC ->000000
  8. Click Load XML def and browse for rawprogram0.xml in Flare Revival Kit
  9. Click Load Patch def and browse for patch0.xml
  10. Check the search path 2 and browse for the folder flare repair files
  11. Now click download, wait for the download to finish (it never finish but it also detects for a new driver, and that’s important) and it will search for the new hardware found, install the driver

  12. From here you can updating your rom to jelly bean using this tutorial Link